A method used in animation and video editing called “keyframing” designates specific locations, or “frames,” as the main points of the animation or film. These pivotal points indicate the start and finish of a particular movement, activity, or transition.
The frames that appear between keyframes are automatically generated by software. It can be done with Filmora, resulting in a seamless transition between them. Filmora Keyframing applies to attributes such as opacity, rotation, scale, and position.
Let’s say you want to highlight a particular ship in a video you took of river transportation. The best approach in such a situation would be to use keyframes to create a gradual zoom-in effect. To initiate the zoom effect, insert a keyframe at the desired location inside the clip. Once that’s where you want the zoom effect to stop, add another point.
This article will discuss the top 5 tips for keyframe animation and how to add keyframes in the video.
Part 1: Best 5 Tips for Keyframe Animation
Here are some tips for the best keyframe animation experience, like easing in keyframes, adjusting speed, etc. Let’s dive deeper into it.
1. Easing in Keyframes
The animation’s method of switching between keyframes is called easing. The animation must flow naturally, and knowing which kind to utilize in any circumstance is crucial. Most animation programs employ linear easing by default, which causes the animation to flow smoothly from keyframe to keyframe.
However, as actual things rarely move at a steady pace, this may appear artificial and robotic. Use various easing techniques, such as ease-in, ease-out, or ease-in-out, to give your animation a more dynamic and realistic feel. To provide the keyframe animation with a sense of momentum and weight, these easing types will cause it to accelerate or decelerate at the start or end of each keyframe.
2. Layer Organization
Maintaining a clean and manageable animation project requires careful layer organization. Layers should consistently be named based on their purpose and content. If many layers are part of the same scene or element, they should be grouped into folders or compositions. When doing keyframing in Filmora, you can quickly move it from one scene to another.
You should also utilize color labels to distinguish between layers—background, foreground, text, or sound. Keeping your layers organized will make it easier to explore your schedule and assist you in staying clear of mistakes.
3. Adjusting Speed of Animation
Keyframe velocity is an effective technique for managing the tempo and pace of animations. You can tweak the motion of your visual effects, add lively motion to objects, and create smooth and realistic keyframe animations by adjusting speed.
The shorter the time gap between keyframes, the faster the layer must change to get to the next keyframe value.
4. Keyframes Naming
An additional crucial component of animation production is keyframe naming. Use consistent, evocative language when titling your keyframes, and consider their purpose and effect when doing so.
To describe the actions of your keyframes, you may use terms like “start,” “end,” “bounce,” “fade,” or “rotate.” Additionally, you may use prefixes or suffixes like “pos_start” or “scale_end” to denote the layer. You can locate and modify your keyframes more rapidly and precisely if you give them names.
5. Focal Point
The focal point of the frame, or the center of attention in the composition, should be the most visible to the spectator. This implies that you must concentrate on the design to make the focal point evident to the spectator.
Creating a distinct focal point in each scene will also help with visual storytelling and narrative flow. Remember that the focus point might be one or multiple subjects, depending on your animation, the scene you’re animating, and the keyframes at any given time.
Part 2: Applying Keyframe Animation in Wondershare Filmora
While there are many tools for editing videos, none are as user-friendly for beginners as Filmora Keyframing. It is compelling regarding the number of features and tools for video editing. The AI-powered tools in Filmora, such as AI Copilot, will simplify your video editing work.
While keyframing isn’t for everybody, Wondershare Filmora makes it very simple. Keyframe animation allows even non-experts to produce visually spectacular films. The keyframe templates are a bonus, too. Your best option is to use the Animation tab’s Presets if you’re pressed for time and need a quick fix.
How to Apply Keyframe Animation in Filmora
Here are the step-by-step instructions on how to add keyframe animations in Filmora.
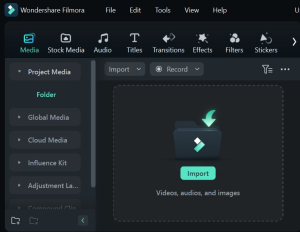
- Step 1: Import the Media
Drag a video clip into Filmora and into the Timeline.
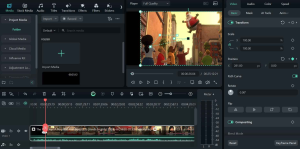
- Step 2: Include the Keyframe Position
In the Timeline, navigate through the media file until you find the perfect place to begin your keyframe transition. Next, create a position keyframe by selecting the video> Basic tab.
Next, to add another position keyframe, activate the Path Curve, forward the playhead to the following frame on the Timeline, and rearrange the item inside the Player. Continue doing this until all of the keyframes are included.
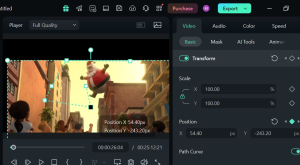
- Step 3: Modify Keyframe
You can customize the keyframe by choosing the keyframes to change the transformation after inserting position keyframes.
- Step 4: Preview and Save
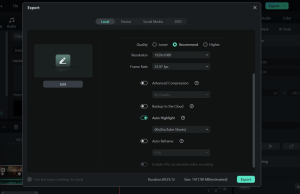
Replay the video. Then, select Export to save the clip to your device.
Part 3: Best Keyframe Animation to Use in Video
Knowing which keyframe animation will make your video most outstanding will be much better than only animating the keyframes. That’s why we will show you some of the best keyframe animations for your video here.
The Fast Zoom
The rapid zoom feature does precisely that: it allows you to zoom into your photo swiftly. When employing this one, be aware that it may disturb your viewers.
As with any editing technique, experiment and see how it flows. If you like it, you may leave it in. This is simply setting two keyframes to raise the image’s scale quickly.
Rotate Effect
You can use keyframes to rotate your video picture. Adding a photo or video clip, graphic, or other content on top of the primary clip is possible. To begin, zoom in on the image to 150 percent of its size.
It is crucial to ensure that your image fills the entire frame once you begin rotation. Then, using the above procedures, zoom in and set keyframes from starting to the end of the clip. After that, you may adjust the amount of rotation. Finally, while the tape plays, your picture will begin to spin.
Text Pop
Instead of gradually disclosing the text through scale, you may insert it using keyframes to do this; the easiest method is to add your title to the Timeline and scale it as desired.
Next, cut the timeline title to exactly where you’d like it to pop up and disappear. The title emerges unexpectedly in one shot, resembling a “pop.”
Slider
The idea behind this animation is simple: you can start by setting position keyframes that move the picture from left to right or vice versa.
This will provide a panning effect as if someone controls the camera. To get the effect, zoom your image and move your location left or right. Then, place your next keyframe at the final point of your clip and drag your position back to the beginning.
Conclusion
Keyframing can bring static photos to life by adding animations. Wondershare Filmora’s super-easy tool allows you to create amazing videos. From simple to advanced keyframing, Filmora has you covered. The customization option allows you to express your creativity and elevate your editing to the professional level.
Keyframe animations will enhance the visual appeal of your logo, and you can animate the text. You can easily make visually appealing videos by following these top 5 keyframe animation tips and utilizing user-friendly tools like Filmora.
Information contained on this page is provided by an independent third-party content provider. Binary News Network and this Site make no warranties or representations in connection therewith. If you are affiliated with this page and would like it removed please contact [email protected]


Comments