Introduction
Restoring and rebuilding an old shotgun can be a rewarding experience for any gun enthusiast. Whether you have inherited a family heirloom or stumbled upon a vintage piece at a gun show, bringing an old shotgun back to life requires patience, skill, and attention to detail. In this comprehensive guide, we will focus on the essential tips and techniques to help you restore and rebuild your old shotgun, with a particular emphasis on the shotgun stock.
Assessing the Condition of Your Old Shotgun
Before embarking on the restoration process, it is crucial to assess the overall condition of your old shotgun. Take the time to examine each component carefully, noting any signs of wear, damage, or missing parts. Pay special attention to the shotgun stock, as it is often the most visible and handled part of the gun.
Inspecting the Shotgun Stock
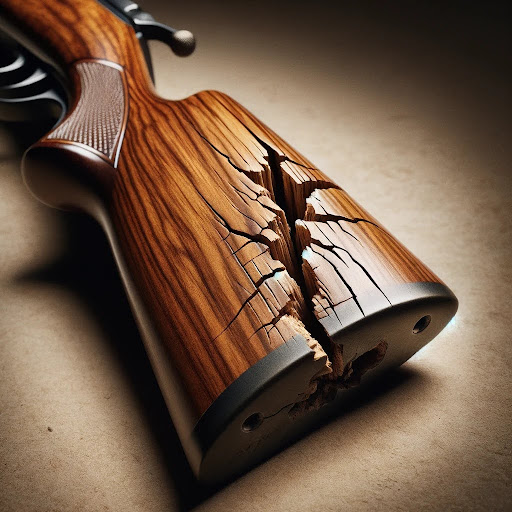
When inspecting the shotgun stock, look for the following issues:
- Cracks or splits in the wood
- Dents or scratches
- Loose or missing hardware
- Signs of previous repairs or modifications
Documenting these findings will help you determine the extent of the restoration work required and create a plan of action.
Disassembling the Shotgun
To properly restore and rebuild your old shotgun, you will need to disassemble it. This process allows you to clean, repair, and refinish each component individually. Before proceeding, ensure that the gun is unloaded and follow proper safety protocols.
Tools Required for Disassembly
To disassemble your shotgun, you will need the following tools:
| Tool | Purpose |
| Screwdrivers | Removing screws and fasteners |
| Punches | Driving out pins and rivets |
| Hammer | Assisting with pin and rivet removal |
| Cleaning supplies | Removing dirt, grime, and old finishes |
Step-by-Step Disassembly Process
- Remove the barrel from the receiver
- Separate the forend from the barrel
- Detach the buttstock from the receiver
- Remove any remaining hardware, such as triggers, guards, and plates
Take notes and photographs throughout the disassembly process to ensure proper reassembly later.
Cleaning and Repairing the Shotgun Components
With the shotgun disassembled, you can now focus on cleaning and repairing each component. This step is essential to ensure the proper functioning and longevity of your restored shotgun.
Cleaning the Metal Components
To clean the metal components of your shotgun, follow these steps:
- Remove any rust or corrosion using a wire brush or steel wool
- Degrease the parts using a solvent or degreaser
- Apply a rust-preventive coating, such as gun oil or rust-inhibiting paint
Repairing the Metal Components
If you notice any damaged or worn metal components, such as the barrel, receiver, or trigger assembly, consider seeking the help of a professional gunsmith. They have the expertise and tools necessary to make precise repairs and ensure the safe operation of your shotgun.
Restoring the Shotgun Stock
The shotgun stock is often the centerpiece of the restoration process, as it greatly influences the overall appearance and feel of the gun. Restoring the stock requires a combination of careful cleaning, repair, and refinishing techniques.
Cleaning the Shotgun Stock
To clean the shotgun stock, follow these steps:
- Remove any dirt, grime, or old finishes using a soft cloth or brush
- For stubborn dirt or finishes, use a mild solvent or stock stripper
- Sand the stock lightly with fine-grit sandpaper to remove any remaining residue
Repairing the Shotgun Stock
If your shotgun stock has any cracks, splits, or missing pieces, you will need to repair them before proceeding with the refinishing process.
Repairing Cracks and Splits
To repair cracks and splits in the shotgun stock, you can use wood glue and clamps:
- Clean the affected area and remove any loose wood fibers
- Apply wood glue to the crack or split, ensuring it penetrates deep into the wood
- Clamp the area tightly and allow the glue to dry according to the manufacturer’s instructions
- Sand the repaired area to blend it with the surrounding wood
Replacing Missing Wood
For missing wood pieces, you can use wood putty or create a custom patch:
- Clean the affected area and remove any loose wood fibers
- Apply wood putty to the missing area, building it up in layers if necessary
- Allow the putty to dry completely, then sand it to match the contours of the stock
- For larger missing pieces, consider creating a custom wood patch and gluing it in place
Refinishing the Shotgun Stock
Once the shotgun stock is cleaned and repaired, you can move on to the refinishing process. This step will protect the wood and enhance the overall appearance of your restored shotgun.
Choosing a Finish
There are several options for refinishing your shotgun stock, including:
- Oil finishes (e.g., linseed oil, tung oil)
- Varnishes and lacquers
- Stains and dyes
Consider the original finish of your shotgun, as well as your personal preferences, when selecting a finish.
Applying the Finish
To apply the finish to your shotgun stock, follow these general steps:
- Sand the stock with progressively finer grits of sandpaper, ending with a very fine grit (e.g., 400-600)
- Apply the finish according to the manufacturer’s instructions, using a brush, cloth, or spray gun
- Allow each coat to dry completely before applying the next
- Sand lightly between coats with fine-grit sandpaper to ensure a smooth finish
- Apply multiple coats until you achieve the desired level of protection and sheen
Reassembling the Shotgun
With all the components cleaned, repaired, and refinished, it’s time to reassemble your shotgun. Refer to the notes and photographs you took during the disassembly process to ensure proper reassembly.
Reassembly Steps
- Attach the buttstock to the receiver
- Secure the forend to the barrel
- Reattach the barrel to the receiver
- Install any remaining hardware, such as triggers, guards, and plates
Testing and Adjusting
After reassembling your shotgun, perform a thorough function test to ensure that all components are working correctly. Make any necessary adjustments to the trigger pull, safety mechanisms, or other parts to ensure safe and reliable operation.
Maintaining Your Restored Shotgun
To keep your restored shotgun in top condition, it’s essential to maintain it properly. Regular cleaning, oiling, and storage in a dry, secure location will help preserve the finish and function of your shotgun for years to come.
Cleaning and Oiling
- Clean your shotgun after each use to remove dirt, debris, and moisture
- Apply a light coat of gun oil to the metal components to prevent rust and corrosion
- Avoid excessive oiling, as it can attract dirt and grime
Proper Storage
- Store your shotgun in a dry, temperature-controlled environment
- Use a gun safe or locked cabinet to prevent unauthorized access
- Consider using a dehumidifier or desiccant to control moisture levels
Conclusion
Restoring and rebuilding an old shotgun, with a focus on the shotgun stock, can be a challenging but gratifying endeavor. By following the tips and techniques outlined in this comprehensive guide, you can bring your vintage shotgun back to life and enjoy it for generations to come. Remember to prioritize safety, take your time, and pay attention to detail throughout the restoration process. With patience and perseverance, you’ll be rewarded with a beautifully restored shotgun that you can be proud of.
Information contained on this page is provided by an independent third-party content provider. Binary News Network and this Site make no warranties or representations in connection therewith. If you are affiliated with this page and would like it removed please contact [email protected]


Comments